

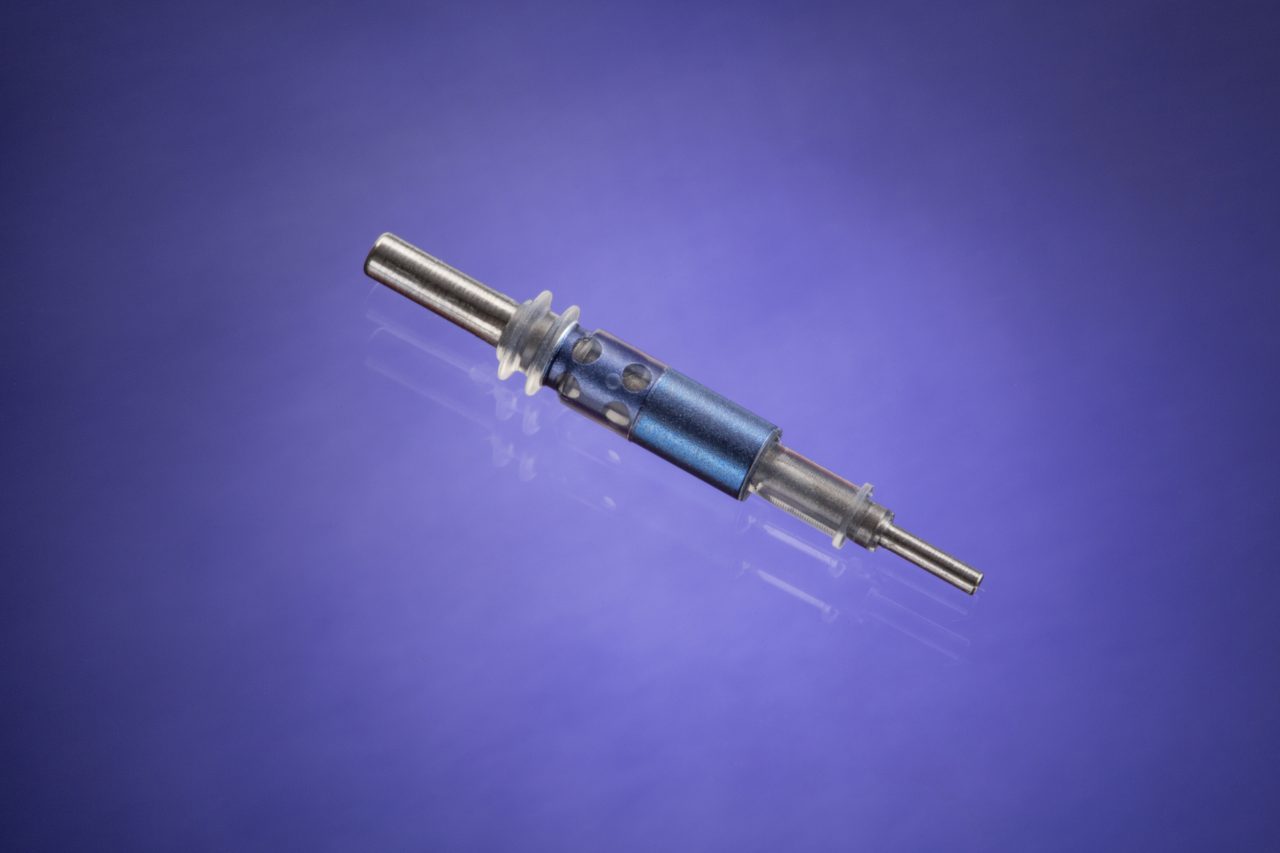
Rubber in its many forms has the ability to bond to metals of all kinds. In fact, bonded rubber is stronger than in its original state, which may be why manufacturers in many industries rely on rubber to metal bonding for their components. Rubber not only produces a very strong bond on metal, but it also can be used to combine several parts into a single assembly.
By taking six steps, beginning with part design and ending with testing, the rubber molder and the manufacturer can ensure the bond is strong enough for the application and its operating environment.
1. Evaluate the Part Design and Geometry for Manufacturability.
With any new project, DFM is the first step. The manufacturer typically specifies the geometry of the metal insert and the grade and type of metal. The molding firm’s engineers will evaluate the design in light of their knowledge of rubber molding processes.
The geometry of the part can present challenges in the molding process, as the rubber filling the mold has very low viscosity. The mold must be designed for a positive shut-off or clamp-off on the metal insert to reduce the amount of flash.
The orientation of the part in the mold is another important consideration. Vertical shut-offs do not achieve optimal cavity pressure to cure the rubber and also result in excess flash, which involves the expense of secondary operations, resulting in a higher piece price. When possible, the molder will want to orient the part horizontally for a stronger bond.
Stamped metal inserts also may present problems for bond strength, as the stamping process does not always hold tight tolerances reliably.
Molding firm engineers and chemists can advise on the best way to design and produce parts that require rubber to metal bonding.
2. Determine how the metal will react to the rubber.
Although most metals can be used in rubber molding of inserts, each metal has a different chemical composition that can react to the type of rubber being used. An important step is to determine the best metal type and grade for the application, as well as the optimal type of rubber to specify for the application.
One problematic material is brass, which contains lead that chemically counteracts rubber bonding. The softer, free-cutting brass materials have higher lead content and can be difficult to bond. Better bond strength can be achieved with the lowest possible level of lead content. FKM rubber, which is chemically inert, also can be challenging to bond. The molding firm’s engineers and chemists can advise on the best rubber material and can develop custom compounds for the application, as needed.
Metal substrate types that can be successfully bonded with rubber include:
Steel
- 430FR
- 17-7 PH
- 17-4 PH
- 304
- 303
- 330
- 26-1
- 4140
- AISI 1050
- Cold rolled steel
- AISI 420B
- E-1050
Brass
- C646
- 36000 HO2
Aluminum
- 2017-T4
- 2011-T3
- 5052-432
3. Procure the Insert
Once all parties agree on the right material for the insert, either the manufacturer or the molder can procure the insert, based on the final specifications. By having the molder procure the insert, the manufacturer can save time and rely on the molding firm’s supplier relationships to ensure quality.
4. Prepare the Part
The molding firm’s ability to prepare the part for maximum bond strength is a key consideration. The complex chemistry of metal and rubber interaction and the effects of the molding process itself must be addressed by preparing the insert.
Preparation includes any or all of the following steps:
- Treating the surface through aluminum oxide grit blasting to allow for more surface area for bonding
- Cleaning the insert with a solvent such as MEK to eliminate any remnants of machine oil or grease
- Applying heat-activated primer and bonding systems such as phenolic resin through dipping, spraying or by hand using artist brushes
- Baking the primed insert to ensure it is dry and set up for molding
- Masking a section of the insert to cover everything except the specific area where rubber is to bond
Most bonding agents are diluted with a reagent grade of solvent, such as methanol, which makes the adhesive easier to spray or dip. It is critical that the correct mixing ratio of adhesive to methanol be developed to ensure that adhesive thickness and percent solids are sufficient to provide a strong bond. If the blend is too viscous, it can result in the adhesive not properly setting up due to a skin cure or being swept off of the insert due to the high-pressure rubber flowing into the cavity. A good molding firm will test to ensure proper percent solids and adhesive thickness on every production run.
5. Employ the Best Molding Processes
Insert molding or overmolding are conducted with compression or transfer molding techniques, depending on the shape and size of the metal part to be bonded.
Compression Molding
Involves pre-forming uncured rubber into a specified shape and weight that is put into a mold cavity. When the mold is closed, two plates put pressure on the elastomer, which then fills the cavity. The elastomer is maintained under pressure and heated until the rubber is cured, allowing the part to maintain its shape.
Transfer Molding
Begins with pre-formed uncured rubber that is placed into the transfer pot of a closed molding system. The ram/plunger then distributes the rubber into the cavities to be shaped into the part, which is then cured by the application of pressure and heat for a specified time period.
After the rubber molding process is complete, typical secondary operations include deflashing to remove excess rubber, post-curing, cleaning and specialty packaging.
Throughout the rubber molding process, it is important to practice proper handling and storage of parts, both after the preparation of the insert, when adhesives have been applied, and after the part has been molded, to avoid contamination. Rubber molded components and inserts should be kept dry, free of dust or dirt, and only handled by operators wearing gloves. Once the part is finished, it should be stored at room temperature and out of direct sunlight. In addition, the part should be kept away from welding operations, which give off ozone that can attack the rubber.
6. Test with Prototypes or the Finished Parts
Testing is typically conducted to see how the part reacts when stressed through compression, tension, shear or torsion. Depending on the part, manufacturers may wish to prototype the molded component for testing to evaluate a range of bonding systems, rather than wait until after production to test the finished part. With rubber bonded to metal parts, the only testing methods for determining bond strength involve destroying the part.
According to LORD Corporation, makers of the Chemlok line of adhesives for elastomers, “There are a wide variety of testing types available. The goal is to evaluate the strength of the bond at the rubber substrate interface by some type of destructive testing. Simple destructive tests, such as hand peeling or stripping, are common for visual performance results. Various test machines, such as tensile testers, are more scientific and will quantify the performance, measuring the amount of force required to break the bond. In all cases, destructive testing, both hand peel or machine testing, helps to determine the quality of the bond.”
ASTM International publishes Standard Test Methods for Rubber Property-Adhesion to Rigid Substrates (ASTM D429), which includes methods for “obtaining comparative adhesion test values of production parts whenever the design permits preparation of suitable test specimens.” See http://www.astm.org/Standards/D429.htm for more information.
When every step of the rubber to metal bonding process is conducted expertly, the end result is a bonded component that is stronger than the sum of its parts. From automotive applications to hydraulics and pneumatics to medical devices, manufacturers employ rubber to metal bonding to ensure that their most critical functions will not fail due to a weak bond.